How to Check Fuel Pressure with OBD2? Complete Guide

To check fuel pressure with OBD2, gather an OBD2 scanner and locate the OBD2 port in your vehicle. Connect the scanner and access the fuel pressure data through the scanner’s menu. Interpret the readings by comparing them to the manufacturer’s specifications. Based on the readings, diagnose any fuel pressure issues and take appropriate steps to resolve them, ensuring regular maintenance for optimal performance.
Fuel pressure plays a vital role in the efficient functioning of an automobile. Whether it’s a gasoline or diesel engine, maintaining the correct fuel pressure is crucial for optimal performance and fuel efficiency. Fortunately, modern vehicles are equipped with On-Board Diagnostic 2 (OBD2) systems that allow us to monitor and diagnose potential issues, including fuel pressure problems.
In this article, we will delve into the process of checking fuel pressure using OBD2 and highlight its importance in vehicle maintenance.
Table of Contents
What really is Fuel Pressure?
Fuel pressure refers to the force the fuel exerts as it travels from the fuel tank to the engine. It is typically measured in pounds per square inch (psi) and ensures that the right amount of fuel is delivered to the engine for combustion.
Insufficient or excessive fuel pressure can lead to issues such as poor engine performance, decreased fuel economy, or even engine damage. Recognizing the signs of low or high fuel pressure, such as engine misfires, stalling, or difficulty starting is essential.
What is the Role of OBD2 in Fuel Pressure Diagnosis?
OBD2 is a standardized diagnostic system implemented in vehicles since the mid-1990s. It provides valuable real-time data and trouble codes that help identify malfunctions and streamline the diagnosis process.
When it comes to fuel pressure, OBD2 scanners can retrieve and display the relevant data from the vehicle’s engine control module (ECM). This data allows us to accurately analyze fuel pressure readings and pinpoint potential problems.
How to Check Fuel Pressure with OBD2? Step by Step
Step 01- Preparing for Fuel Pressure Check
Before checking the fuel pressure with OBD2, gathering the necessary tools and equipment is important. You’ll need an OBD2 scanner that supports the appropriate fuel pressure data, which can typically be found in the scanner’s user manual or specifications.
Safety should also be a priority, so make sure you’re working in a well-ventilated area, away from open flames or potential ignition sources. Additionally, identify the location of the OBD2 port in your vehicle, as it may vary depending on the make and model.
Step 02- Connecting OBD2 Scanner
To begin the fuel pressure check, choose a compatible OBD2 scanner that can retrieve the necessary data. Once you have the scanner, locate the OBD2 port, which is usually located beneath the dashboard on the driver’s side.
Plug the scanner’s connector into the port firmly, ensuring a secure connection. Once connected, you can proceed to establish communication between the scanner and the vehicle’s ECM.
Step 03- Accessing Fuel Pressure Data
After connecting the OBD2 scanner, navigate its menu using the provided buttons or touchscreen. Look for the diagnostic function related to fuel pressure. Depending on the scanner, this function may be labeled as “Fuel Pressure” or may be located within a broader category such as “Fuel System.” Select the appropriate option to initiate the retrieval of fuel pressure data from the vehicle’s ECM.
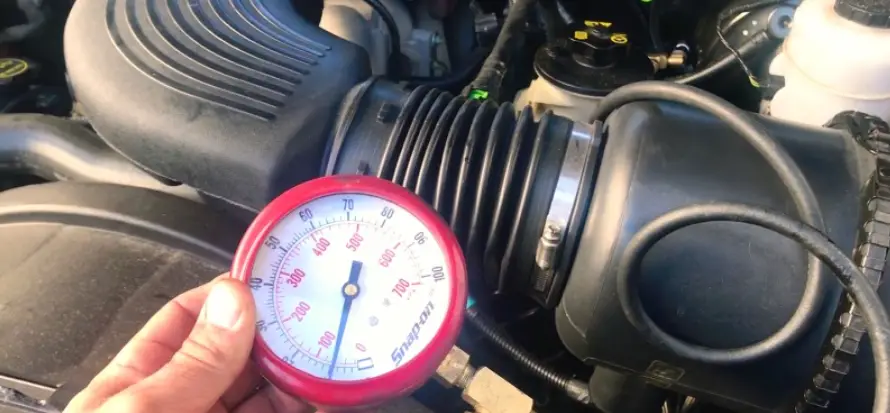
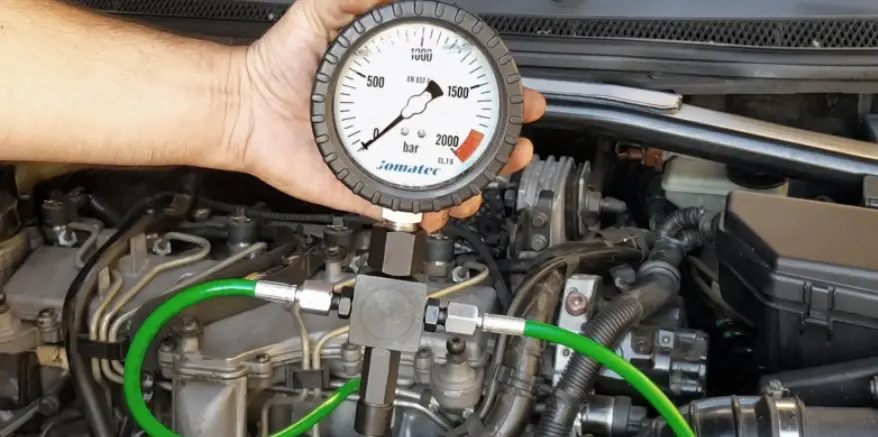
Step 04- Interpreting Fuel Pressure Readings
Once the OBD2 scanner retrieves the fuel pressure data, it’s essential to understand how to interpret the readings.
The normal fuel pressure range can vary depending on the vehicle, so consult the manufacturer’s specifications to determine the acceptable values.
Analyze the obtained readings and compare them to the recommended range. If the readings fall outside the specified range, it indicates a potential fuel pressure issue.
Diagnosing Fuel Pressure Issues
Based on the fuel pressure readings obtained, you can identify potential problems. Low fuel pressure may be caused by issues such as a faulty fuel pump, clogged fuel filter, or a leak in the fuel system.
On the other hand, high fuel pressure could result from a malfunctioning fuel pressure regulator or a restricted fuel return line. Assess the severity of the issue and consider consulting a professional mechanic for further guidance, especially for complex problems.
How to Address Low Fuel Pressure?
To resolve low fuel pressure issues, check the fuel pump and filter for any signs of malfunction or blockage. If necessary, replace the faulty components and ensure they are properly installed.
It’s crucial to address any underlying issues and conduct regular maintenance to prevent the recurrence of low fuel pressure problems. Remember that a healthy fuel system contributes to overall vehicle performance and longevity.
How to Resolve High Fuel Pressure?
Inspect the fuel pressure regulator for any defects or blockages when dealing with high fuel pressure. Consider replacing the regulator if it is determined to cause the problem.
Also, check the fuel return line for any restrictions contributing to the high pressure. Complex issues related to high fuel pressure may require the expertise of a professional mechanic. Seeking professional assistance can save time and prevent further complications.
how to check fuel injectors with obd2 scanner?
To check fuel injectors with an OBD2 scanner, follow these step-by-step instructions:
Step 01- Gather the necessary tools:
- You will need an OBD2 scanner that supports fuel injector testing and provides live data.
Step 02- Locate the OBD2 port:
- Find the OBD2 port in your vehicle, which is typically located under the dashboard on the driver’s side.
- It may have a cover that needs to be removed.
Step 03- Plug in the OBD2 scanner:
- Connect the OBD2 scanner’s connector to the OBD2 port firmly.
- Ensure a secure connection is established.
- Power on the scanner: Turn on the OBD2 scanner and wait for it to initialize.
- Follow any prompts or instructions that appear on the scanner’s display.
Step 04- Access the diagnostic menu:
- Navigate through the scanner’s menu using the provided buttons or touchscreen.
- Look for the diagnostic function related to fuel injectors.
- It might be labeled as “Injector Test” or similar.
Step 05- Select the fuel injector test:
- Once you locate the fuel injector test option, select it to initiate the testing process.
Step 06- Follow on-screen instructions:
- The scanner will provide instructions on performing the fuel injector test.
- This may involve starting the engine, revving it to a certain RPM, or following specific prompts.
Step 07- Observe the results:
- The scanner will display the live data from fuel injectors.
- Look for abnormalities like uneven spray patterns, inconsistent fuel delivery, or faulty injectors.
Step 08- Analyze the data:
- Interpret the data displayed on the scanner and compare it to the expected values.
- Any injectors showing significant deviations or inconsistencies may require further inspection or potential replacement.
Step 09- Take necessary actions:
- Based on the results and analysis, determine the appropriate course of action.
- This could involve cleaning or replacing the faulty fuel injectors, addressing fuel delivery issues, or seeking professional assistance for more complex problems.
Step 10- Complete the process:
- After reviewing the fuel injector data and taking necessary actions, exit the test menu on the OBD2 scanner.
Step 11- Disconnect the OBD2 scanner:
- Safely disconnect the OBD2 scanner from the OBD2 port by removing the connector.
Following these step-by-step instructions, you can effectively check the fuel injectors using an OBD2 scanner. Consider your vehicle’s manual or seek professional advice if you encounter any difficulties or have specific concerns about your vehicle’s fuel injectors.
Will Disconnecting Battery Reset Fuel Gauge?
solidcarcare.com
Conclusion
Checking fuel pressure with OBD2 is valuable in maintaining a healthy fuel system. By utilizing an OBD2 scanner and interpreting fuel pressure readings, you can identify potential issues and take appropriate measures to resolve them. Regular fuel pressure checks and proactive maintenance improve vehicle performance, efficiency, and reliability. Embrace the power of OBD2 and stay proactive in ensuring the health of your vehicle’s fuel system.